|
|
|
|
|
|

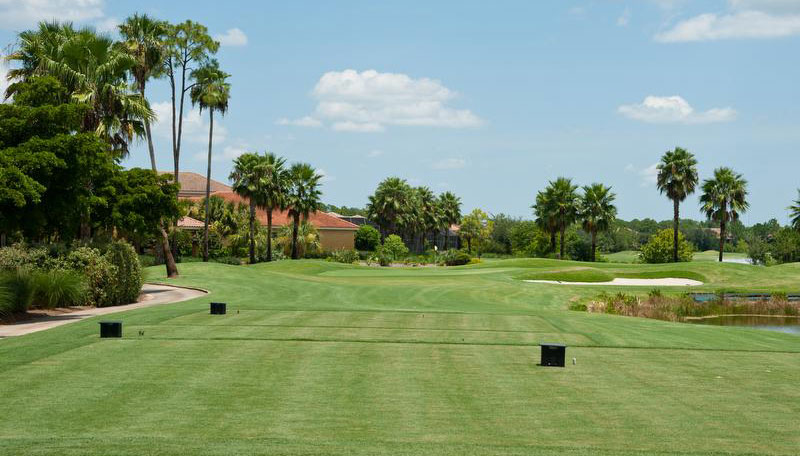
Hole #1
Par 4
| |
Gold |
429 |
| |
Blue
|
402 |
| |
White
|
371 |
| |
Green |
342 |
| |
Red |
287 |
Still a tough opener even though the right and left side of the hole has been widened considerably to allow more room off the tee. The far left fairway bunker denotes the lake edge for those capable of hitting a drive that far. A fairway wood or long iron is needed for most players on the approach, which now has ample room to the right of the green to collect errant shots. Par here is a great start to your round.

Hole #2
Par 4
| |
Gold |
419 |
| |
Blue
|
391 |
| |
White
|
355 |
| |
Green |
325 |
| |
Red |
286 |
This long par 4 has been widened on the left side of the hole during the recent renovation by removing the concrete cart path and stand of trees that hindered many tee shots that hugged that side. The more receptive landing area will provide players better visibility off the tee and more freedom to start the ball down the left side. A new bulkhead wall frames the right side of the approach and allows a wider area to run the ball into the green. Putting will be an adventure here if you end up on the wrong side of the hole.

Hole #3
Par 4
| |
Gold |
388 |
| |
Blue
|
365 |
| |
White
|
339 |
| |
Green |
302 |
| |
Red |
278 |
The signature hole at Vasari, this par 4 doglegs to the right with water framing the entire right side of the hole. A wide fairway will receive your tee shot. If you choose to bite off the dogleg, make sure you carry the massive bunkers along the right side. The approach shot is usually a short iron to a half island green. Many approaches find a watery grave here, so be careful.

Hole #4
Par 3
| |
Gold |
189 |
| |
Blue
|
171 |
| |
White
|
144 |
| |
Green |
125 |
| |
Red |
101 |
This is the most scenic par 3 on the course, which requires the tee shot to carry a large pond. With the water in front and a bunker left, there is plenty of room beyond the green complex to receive your tee shot, so make sure you take enough club off the tee.

Hole #5
Par 4
| |
Gold |
369 |
| |
Blue
|
343 |
| |
White
|
329 |
| |
Green |
285 |
| |
Red |
217 |
A skinny fairway on this winding par 4 is what you see from the tee. Hit it and you are looking at a mid to short iron approach that needs to carry the pond that juts out in front of the green. Be warned, big hitters: you can't see the pond as it creeps out behind the lone fairway bunker. Hit your drive over that bunker and you are wet.

Hole #6
Par 5
| |
Gold |
550 |
| |
Blue
|
522 |
| |
White
|
499 |
| |
Green |
460 |
| |
Red |
378 |
The first of consecutive par 5's is a sharp dogleg left off the tee. New tee box positions will give you a more straight on view of the fairway. Keep your tee shot in front of the wall of bunkers framing the right side of the fairway. This is a three shot hole even for long hitters so be precise with your lay up. The smart play is to hit a short to mid iron for your second shot and avoid the water in the front. The new green has no bunkers around it but lots of subtle rolls. Approach shots here have usually found the water if they come up short, but a new bulkhead wall to the right of the green complex has leveled out the terrain and should keep balls from swimming.

Hole #7
Par 5
| |
Gold |
492 |
| |
Blue
|
466 |
| |
White
|
440 |
| |
Green |
411 |
| |
Red |
362 |
The ideal tee shot here favors the left half of the fairway to offer the best view of the green. Long hitters can be more confident to give it a go and try to get there in two with the added room behind the green and small support mounds left of the green offering a favorable bounce. For those laying up, beware of the pond that lurks along the entire right side of the fairway from 180 yards out all the way to the green. A bulkhead wall was installed in 2009 that allows extra room for the landing area there. The overall green target is inviting for those in position to go for it.

Hole #8
Par 3
| |
Gold |
196 |
| |
Blue
|
187 |
| |
White
|
160 |
| |
Green |
135 |
| |
Red |
115 |
This challenging par 3 requires you to maintain your focus as you near the end of the front nine. The tee shot is usually a mid to long iron that needs to negotiate the large pond in front. The entire right side of the hole has been cleared of the shrubs and trees to allow a recovery shot for those who miss the green wide right. The green slopes back to front with support mounds back center to help slow a hot tee shot.

Hole #9
Par 4
| |
Gold |
329 |
| |
Blue
|
322 |
| |
White
|
308 |
| |
Green |
278 |
| |
Red |
201 |
A very short hole to wrap up the front. Not much is needed off the tee. The approach shot will make or break you here. Depending on pin location, it could offer a good birdie opportunity. The safe approach is the middle of the green, though if the pin is cut left you have plenty of room to hit it tight. For those who get greedy when the pin is on the right, remember the wrap around bunkers are lurking! Sometimes a par on a short hole is a great score.

Hole #10
Par 4
| |
Gold |
364 |
| |
Blue
|
347 |
| |
White
|
320 |
| |
Green |
299 |
| |
Red |
257 |
The back nine starts with a whole new look to this par 4. The tee shot no longer has to navigate the large bunker fronting the right side of the fairway or the grove of trees sticking out on the left side. A new bunker has been placed further up the right side of the hole to guard tee balls running through the fairway and potentially finding the water which runs along the entire right side. The approach has been softened by removing the large mound on the front left of the green.This opens up the new green complex which now is angled left to right with a lot of undulations to get your attention with the flat stick.

Hole #11
Par 5
| |
Gold |
545 |
| |
Blue
|
530 |
| |
White
|
506 |
| |
Green |
457 |
| |
Red |
396 |
This par 5 has been shortened but is still a challenge. The tee shot gives you a generous landing area, but the fun starts on the next shot. Stay right of the fairway bunkers to avoid sand or a watery grave. The new green has been pushed forward and reshaped. The area around the green has been made more friendly by removing the large mound in front, eliminating the many pot bunkers and creating more room in the back allowing players to have a much better shot at par.

Hole #12
Par 4
| |
Gold |
392 |
| |
Blue
|
385 |
| |
White
|
343 |
| |
Green |
274 |
| |
Red |
254 |
This hole is much more demanding for the men now that a new island tee has been added 60 yards back from the original tee. The back tees still sit on a hill looking down on the fairway. Driver or fairway wood is required from back there. All you need from the green or red tees is a mid iron to find the fairway. The smallest green on the course awaits your approach, and a new bulkhead wall placed to the front and right of the green should keep short shots dry where they previously might have found the drink.

Hole #13
Par 4
| |
Gold |
366 |
| |
Blue
|
362 |
| |
White
|
304 |
| |
Green |
270 |
| |
Red |
249 |
Short par 4. Tee shots from the Gold and Blue tees require a 180 yard carry over the pond to reach the fairway. White, Green and Red tees have a straight on shot with the pond to your right. Try and keep your tee shot left of center to give you the best angle in to the long, skinny green. Errant tee shots to the right will block your view to the green because of the preserve area along the right side. The grass swale right of the green offers more overall width than meets the eye.
Hole #14
Par 3
| |
Gold |
141 |
| |
Blue
|
133 |
| |
White
|
119 |
| |
Green |
104 |
| |
Red |
95 |
Shortest hole on the course, but don't let your guard down. Make sure you take enough club as the open area is susceptible to swirling winds. A new bunker in front will catch a lot of tee shots coming up short. Water lurks all along the right side and in front of the green, which is small and undulating. Many a three putt can be found here, so be careful.

Hole #15
Par 4
| |
Gold |
432 |
| |
Blue
|
410 |
| |
White
|
382 |
| |
Green |
300 |
| |
Red |
274 |
Finding the fairway here isn't the problem. The approach on this long par 4 is the challenge. The larger green is protected by a pond in front and behind. Short and left is a popular spot. Pitch it close and make your putt. Par is a great score, and certainly nothing wrong with a bogey here.

Hole #16
Par 3
| |
Gold |
184 |
| |
Blue
|
174 |
| |
White
|
157 |
| |
Green |
126 |
| |
Red |
106 |
Two different tee shots depending on the tee you play. From the Gold, Blue and White tees, it's all carry to a severely two tiered green. The pot bunker in front has been removed to allow an easier approach. From the Green and Red tees, the water is taken out of play. Pop a short iron on and give yourself a good chance at a birdie.

Hole #17
Par 5
| |
Gold |
543 |
| |
Blue
|
522 |
| |
White
|
500 |
| |
Green |
419 |
| |
Red |
397 |
Long hitters can take a crack at the green in two on this par 5. Widest fairway on the course sets up great opportunity to score. Watch the two water hazards jutting out along the right side of the hole, especially when laying up. Keep your lay up shot to the left to get the best angle into the green. The bunkers left of the second shot landing area offer the perfect target for those going for the green in two. Great chance for birdie or par at the tail end of your round when played smartly.

Hole #18
Par 4
| |
Gold |
329 |
| |
Blue
|
330 |
| |
White
|
296 |
| |
Green |
277 |
| |
Red |
251 |
A scenic finish to the back nine, the entire hole is a peninsula jutting out into Lake Vasari, with the clubhouse, bridge and fountain in the background. An accurate tee shot is required to leave a short iron to a large green. Wind can sometimes be a factor here resulting in a difference of two or three clubs from a front pin to a back pin.
|
|
|
|
|
|